How to Speed up Checkout Lines Without Hiring More Cashiers
How to speed up checkout lines: time each step of a sale, turn off terminal prompts you no longer need, and add line busting at peak hours.

Photo: Pixabay
On this page 7 sections
- How to Speed up Checkout Lines Starts With a Stopwatch
- Tap to Pay, Signatures and Tip Prompts: Settings That Shave Seconds
- Line Busting With Handheld and Mobile POS
- Staff the Rush From Your Own Hourly Sales Data
- Queue Layout That Keeps Lines Moving
- Cashier Habits That Cut Transaction Time
- Measure Wait Times Before and After Each Change
Key takeaways
- Since April 2018, Visa, Mastercard, American Express and Discover haven't required signatures at U.S. checkouts. If your terminal still asks for one, that's a setting, and your processor can change it.
- Visa's research, as SCORE reports it, puts a contactless card payment at about half the time of an inserted chip card. Getting customers to tap is the cheapest speed fix most stores have.
- Divide your peak-hour transaction count by what one register can realistically handle. That number tells you whether a faster sale removes the need for an extra lane.
To speed up checkout lines without hiring more cashiers, take seconds out of every sale and add temporary capacity only in the hours that need it. Start by timing sales in four steps: greeting, scanning, payment and receipt. Then fix the slowest step first. Owners usually assume scanning is the problem, but the payment and receipt steps tend to hold the easiest gains, because many of them are terminal settings nobody has changed since the device was installed.
A shorter sale does more than save a few seconds. It raises the number of customers each register can serve in an hour, and at peak that can decide whether you need three lanes open or four.
How to Speed up Checkout Lines Starts With a Stopwatch
During your busiest hour this week, stand near the register with a phone timer and clock 20 transactions. Split each one into four steps:
- Greeting: from the customer reaching the counter to the first item scanned. This includes loyalty lookups and, in liquor stores, ID checks.
- Scanning: from the first item to the subtotal, including price checks, produce weighing and voids.
- Payment: from the subtotal to approval, including every screen the customer has to answer on the terminal.
- Receipt: from approval to the customer walking away, including bagging, printing and counting change.
The table below is an illustrative example. The numbers are assumptions, not measurements, and they're there to show how the math works.
| Step | Before (seconds) | After fixes (seconds) |
|---|---|---|
| Greeting | 10 | 8 |
| Scanning | 35 | 32 |
| Payment | 30 | 18 |
| Receipt and bagging | 15 | 8 |
| Total | 90 | 66 |
At 90 seconds a sale, one register can handle at most 40 transactions an hour (3,600 ÷ 90). At 66 seconds, the ceiling rises to about 54.5 (3,600 ÷ 66). The same cashier now has roughly 36% more capacity (54.5 ÷ 40 = 1.36). Most of that gain came from payment and receipt, the two steps owners most often skip when they time a sale.
No register ever reaches its ceiling, because customers don't arrive evenly. The ratio still holds, though. Whatever you cut from the average sale becomes capacity you didn't have to hire.
Tap to Pay, Signatures and Tip Prompts: Settings That Shave Seconds
Terminal configuration matters most in the payment step. Most of these fixes cost nothing because they're settings, not purchases.
Get Customers Tapping Instead of Inserting
A chip card has to stay in the reader until authorization finishes, and a customer who pulls it out early has to start again. A contactless tap with a card or phone wallet avoids that. Visa research cited by SCORE found that a contactless card payment took about 7.8 seconds, against 14.8 seconds for an inserted chip card. That is roughly half the time on the step where lines stall most.
So make tapping the obvious choice. Angle the terminal toward the customer, put it where the contactless symbol is the first thing they see, and keep it clear of counter clutter. Train cashiers to say "tap when you're ready" instead of "insert your card." If your terminals can't take contactless payments yet, our guide to contactless payments for small business covers setup and costs.
Turn off Signature Capture Unless You Have a Reason to Keep It
This rule is widely misunderstood, and it costs stores time on every card sale. The card networks stopped requiring signatures in 2018. Mastercard announced it would no longer require signatures at checkout for credit or debit purchases in the U.S. and Canada starting in April 2018. CNN Money reported that American Express, Discover and Mastercard dropped the requirement on April 13, 2018, and Visa followed on April 14. According to American Banker, Visa made signatures optional for North American merchants that accept chip cards by insert or tap. American Express dropped the requirement worldwide, as the Electronic Transactions Association reported.
That is a network rule change. Signatures are now optional, which means the decision belongs to you. CNN Money also pointed out why so many terminals still ask: the prompt is built into the terminal, and merchants have to take steps to remove it. Ask your processor to turn off signature capture. If you keep it for a specific reason, such as a restaurant that adds tips on a printed slip after the card is run, keep it only where that workflow needs it.
PIN entry is a separate issue. Debit PIN prompts are part of how some debit transactions are verified and routed, so don't try to suppress them.
Tighten or Remove the Tip Screen
At a hardware store or liquor counter, a tip prompt adds a screen and an awkward pause for no benefit, so turn it off. In coffee shops, quick-service restaurants and bars, where tips matter to staff, keep the prompt but cut it to one screen. Offer three preset percentages, put a clear "no tip" button on the same screen, and leave custom amounts off unless customers ask for them.
Count Every Screen Between Subtotal and Approval
Run a test sale and count the screens. Cash-back offers, donation requests, loyalty sign-ups and email-receipt prompts add seconds to every sale. Remove any screen you can't justify for a peak-hour customer. If you want email addresses, there are ways to collect them without slowing lines at checkout.
Be careful with one prompt. A "debit or credit" question can affect how a debit card is processed and what you pay for it. Ask your processor what happens before you remove it, and read our comparison of debit vs. credit card processing fees for the cost side.
Receipts are the last setting to review. Printing only when a customer asks, or offering a digital receipt, removes a step and a common jam point. Before you change the default, ask your processor which receipt options your setup supports.
Line Busting With Handheld and Mobile POS
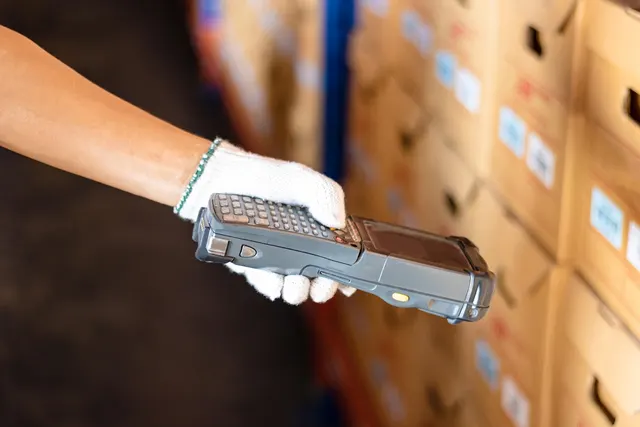
In line busting, a staff member works the queue with a handheld device and scans items before the customer reaches the counter. In some setups they also take payment. It adds a lane without a fixed register or a new hire, because the person doing it is usually a stocker or floor associate who's already on the schedule.
There are two common setups:
- Scan and send. The associate scans the basket, and the order shows up at the main register ready to pay. The cashier only takes payment. This suits grocery and retail stores where some customers still pay cash.
- Scan and pay. The associate takes card payment on the handheld, and the customer leaves without stopping at the counter. This suits small baskets paid by card.
Handheld terminals such as the Clover Flex 4G or the PAX A920 Pro are built for work on the sales floor. Before you rely on any device at peak, check three things. First, it must share live inventory and pricing with your main POS, because a handheld that rings up a different price than the register creates more delays than it removes. Second, it has to accept the payment types your rush customers use, from gift cards to EBT, or you need a quick handoff to the counter for anything it can't take. Third, it needs a connection everywhere on the floor. Test Wi-Fi at the back of the line, or choose a cellular-capable model.
How this works depends on your type of store. In liquor stores, an associate with a handheld still has to follow your state's ID-check rules and your store's carding policy, so give them a scanner or a clear manual procedure. Those rules vary by state, so confirm yours with your state alcohol regulator or a qualified professional. In grocery markets, produce that needs weighing usually goes to a lane with a scale, so line busters take the packaged-goods baskets. At restaurants and bars, the handheld becomes pay-at-the-table or order-at-the-rail, so guests aren't all waiting for one counter terminal to close out their checks.
Staff the Rush From Your Own Hourly Sales Data
Your POS already knows when you're busy. Pull a report of transactions by hour for the last four to six weeks. Then average each day-and-hour slot on its own, such as Saturday from 11 a.m. to noon or Friday from 5 to 6 p.m.
Next, divide each slot's average by what one register can realistically handle. Here's an illustrative example that uses the timing table above. Assume a busy Saturday hour averages 110 transactions. Also assume you plan for each register to be busy about 80% of the hour, which leaves slack for slow sales and bursts of arrivals. The 80% figure is our planning assumption, not an industry standard, so adjust it to how bunched up your rushes are.
- Old 90-second average: 40 × 0.8 = 32 sales per register-hour, and 110 ÷ 32 = 3.4, so you need 4 registers.
- New 66-second average: 54.5 × 0.8 = 43.6 sales per register-hour, and 110 ÷ 43.6 = 2.5, so you need 3 registers.
The faster sale freed up a full register for that hour. Repeat the math for each peak slot and you have a staffing plan built on your own numbers.
The other half of the plan is cross-training. Pick two or three floor staff who can open a register or pick up a handheld when the line passes a set length, and schedule them for the peaks your report showed. A cashier training checklist helps get backup staff ready to work a register quickly.
Queue Layout That Keeps Lines Moving
Where the line forms affects how long the wait feels and how long it actually takes.
When you have the floor space, run one line that feeds several registers. A single winding queue sends each customer to the next open lane, so one slow sale, like a price check or a declined card, doesn't trap everyone behind it. Customers also stop trying to guess which line is fastest.
During peaks, open an express lane with a clear item limit. Customers with small baskets are the ones most likely to give up on a long line, and an express lane gives them a reason to stay.
Move impulse displays off the counter and along the queue path. A display the customer has to reach around slows down bagging and payment, while one along the line still sells to people as they wait. Give pickups their own shelf or window, too, so someone collecting a prepaid online order isn't stuck behind five people who are paying. Keep bags within the cashier's reach, and at a liquor counter, keep the ID scanner next to the terminal rather than in a drawer.
Cashier Habits That Cut Transaction Time
Settings and layout set the limit, and habits decide how close each cashier gets to it.
- Greet while scanning. Say hello as the first item crosses the scanner instead of pausing for it.
- Post your most-rung codes. Keep a list of the produce and item lookup codes your store uses most at the register until staff know them by heart.
- Bag during authorization. Bagging fits in the seconds while the terminal waits for approval.
- Send a runner for price checks. If your POS can suspend a sale, the cashier stays put and starts scanning the next customer's items.
- Handle declines calmly. A short script keeps the moment quick and private. See what cashiers should say when a card is declined.
- Restock the drawer before the rush. Running out of ones mid-rush stalls the lane, so make a safe drop and change order routine part of your pre-peak checklist.
- Call for backup early. Set a trigger, such as four customers waiting, and make calling for help the normal thing to do, not a sign that a cashier is falling behind.
Measure Wait Times Before and After Each Change
Change one thing at a time and measure again, or you won't know what worked. Track three numbers. The first is average transaction time by step, using the same 20-sale stopwatch sample at the same peak hour. Some POS systems log when each sale opens and closes, which saves you the stopwatch. The second is line length, counted every 15 minutes during peak and written on a sheet by the register. The third is walkaways: baskets left behind and customers who leave the line, tallied for a week before a change and a week after.
These numbers tell you whether a handheld, a settings change or a new schedule was worth it. They also tell you when you really do need another cashier.
This Saturday, time 20 sales during your busiest hour and write down the slowest step. If it's payment, start with the signature and tip settings, since changing those is free. If the problem is old hardware that can't take a tap, MannyPay offers POS systems and terminals for retail businesses. You can request a free quote, and a MannyPay specialist will respond within one business day.
Sources
- No More Signing on the Dotted Line (Mastercard)
- Credit Card Signatures Are Almost a Thing of the Past (CNN Money)
- Visa to Drop Signature Requirement in North America, Joining Other Major Card Brands (American Banker)
- American Express Eliminates Signature Requirement (Electronic Transactions Association)
- No Signature Required (TSYS)
- Mobile and Cashless Payments Fast-Start (SCORE)
This article is for general educational purposes and is not legal, tax or financial advice. Card network rules and state laws change; confirm current requirements for your business.